Fine Tuning the Flaps
One of the biggest challenges to getting better
airflow over the top of the windshield and under the wing was
the position of the flap actuating rod. It was in the way of good
airflow, and I wanted that area free of any non structural obstructions.
So I moved it down, flipped the control horns over, and made it
direct actuating without any linkage.
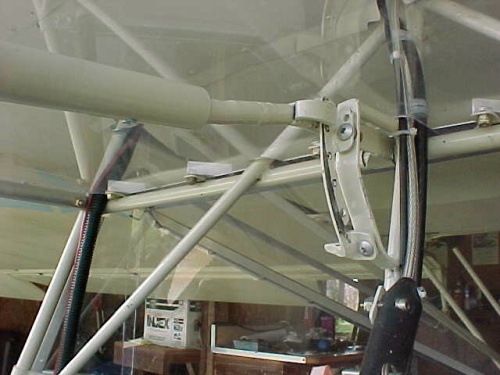
.JPG)
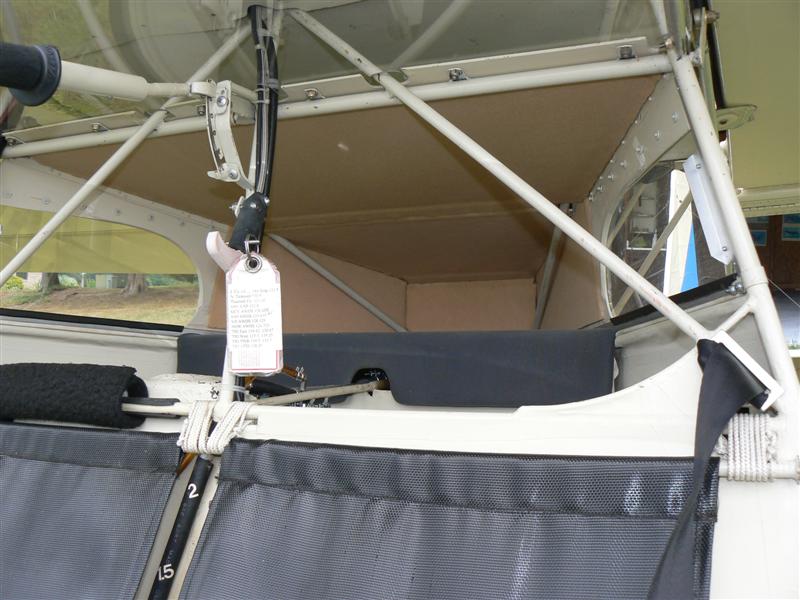
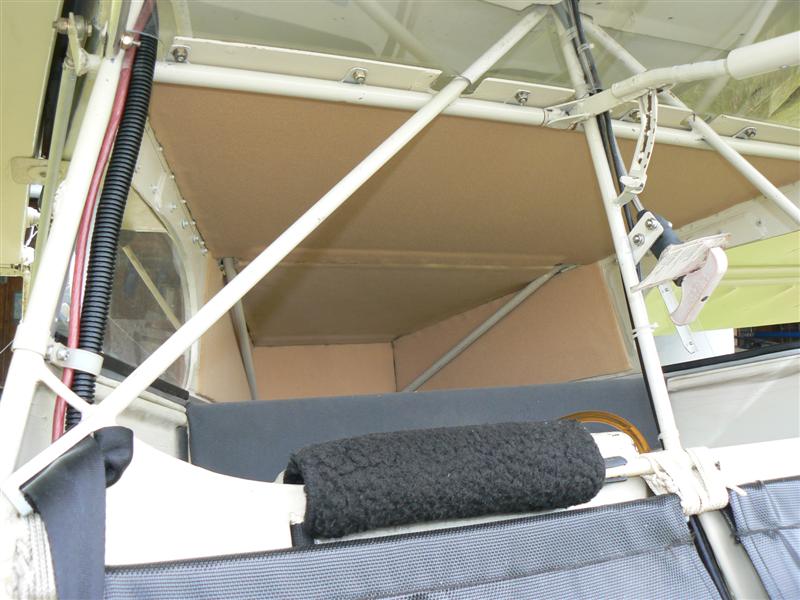
 Here you can see some of the basics: (Picture on
the right & the next two lower ones are from a couple years
ago, but the mechanism is the same) There are now 2 separate 5/8"
x .028 4130 tubes as sleeves that are welded to the uprights and
diagonals and extends from the outside of the airplane almost
to the middle of the airplane, one tube on each side. The flap
actuating rod runs through them. The flap actuating rod is a length
of 1/2" x .058 4130. The outer sleeve tubes have a number
of tabs welded to them that extend ahead and behind, this is to
attach the windshield and the rear cabin top. You can also see
an aluminum u-channel attached to the rear of the outer vertical
uprights, this is what the front edge of the rear side sliding
window fits into.
Here you can see some of the basics: (Picture on
the right & the next two lower ones are from a couple years
ago, but the mechanism is the same) There are now 2 separate 5/8"
x .028 4130 tubes as sleeves that are welded to the uprights and
diagonals and extends from the outside of the airplane almost
to the middle of the airplane, one tube on each side. The flap
actuating rod runs through them. The flap actuating rod is a length
of 1/2" x .058 4130. The outer sleeve tubes have a number
of tabs welded to them that extend ahead and behind, this is to
attach the windshield and the rear cabin top. You can also see
an aluminum u-channel attached to the rear of the outer vertical
uprights, this is what the front edge of the rear side sliding
window fits into.
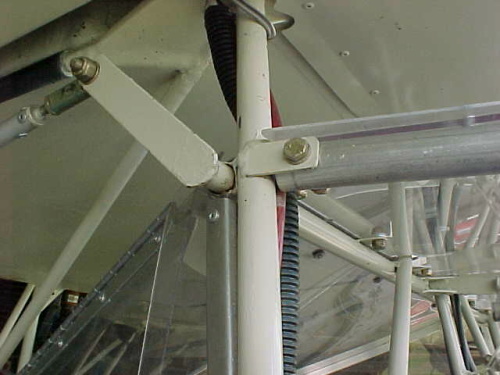
The flap lever itself was welded to the actuating
rod and gusseted, everything was assembled and then the sleeve
tubes were welded to the uprights, so there was little margin
for error. The lever is just to the passenger side of the center
upright. I replaced the original 3 position slider/locator detent
piece with a new strip that allows me a number of positioning
options for the flaps, they can be down, normal, or reflexed,
depending on whether I am solo or carrying a passenger. This helps
the trim situation more than you could imagine. The MKIII responds
quickly to trim inputs from the flaps. Lowering the flaps causes
the airplane to nose down, as the center of pressure on the wing
moves aft as the airfoil changes, and raising (reflexing) the
flaps causes it to nose up as the center of pressure on the wing
moves forward.
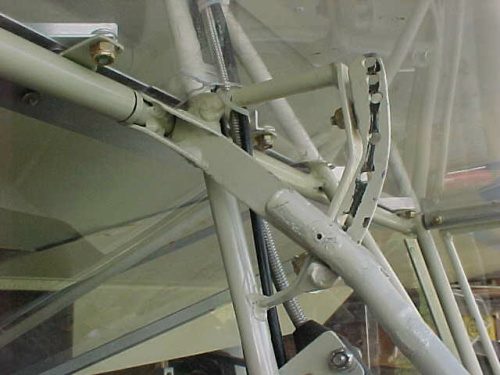
The flap handle now has a small bushing welded into
it, and a roll pin driven into the bushing. The roll pin fits
into the holes in the strap similarly to how the original positioner
worked, however it is now possible to have three holes quite close
together at the up position to fine tune the airplane's pitch
trim. There are seven holes total, the top three for trimming
the airplane, only the bottom four actually lower the flaps to
any extent. The handle is longer than originally, as there was
not enough leverage with the original length of handle to get
that last position for about 35 degrees of flaps.
 I cut the whole original Kolb flap assembly off
with a Moto-Tool and rewelded it about five inches down from the
wing, and then fabricated a locator strap separately and bolted
it in position, it was easier to get everything to line up that
way.
I cut the whole original Kolb flap assembly off
with a Moto-Tool and rewelded it about five inches down from the
wing, and then fabricated a locator strap separately and bolted
it in position, it was easier to get everything to line up that
way.
Here's how it looks with the new cabin top in place.